Today, we will discuss how to use Azure Data factory to copy data from Azure Data Lake Gen1 into Data Lake Gen2.
Prerequisites:
Refer the below steps to copy your data:
As always do let us know if you have questions or comments using the comments section below!
Prerequisites:
- Azure Data Lake Gen1
- Data Factory
- Azure storage with Data Lake Gen2 enabled
Refer the below steps to copy your data:
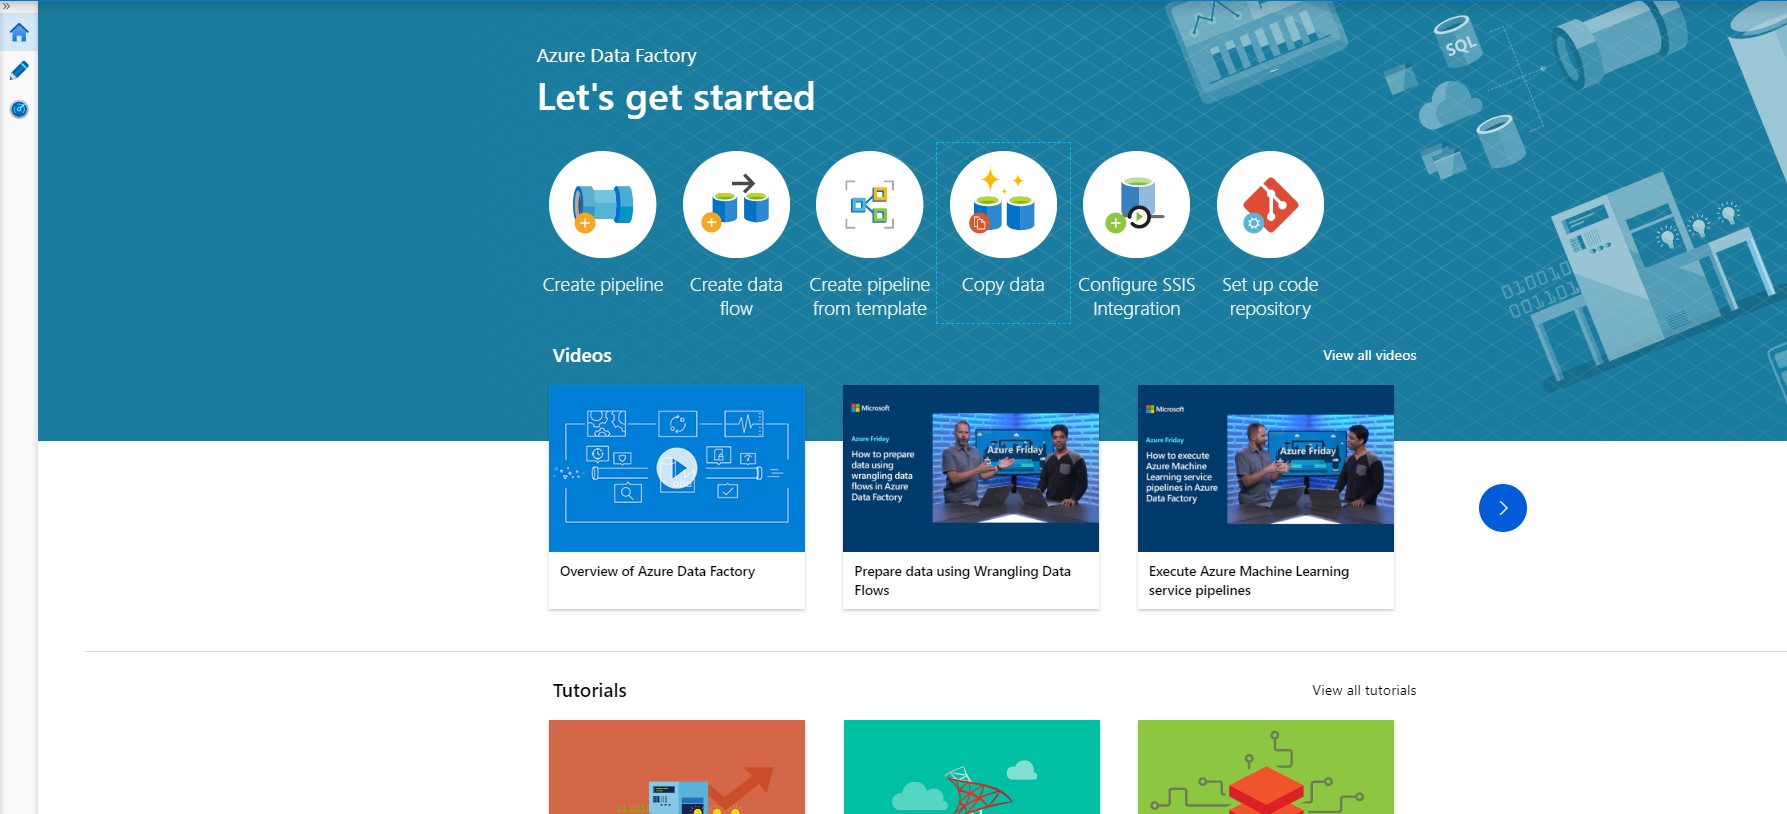
- Open your Azure portal and go to Data Factory then click on Author & Monitor.

- It will open a Data Integration Application in new tab. Now click on Copy Data.
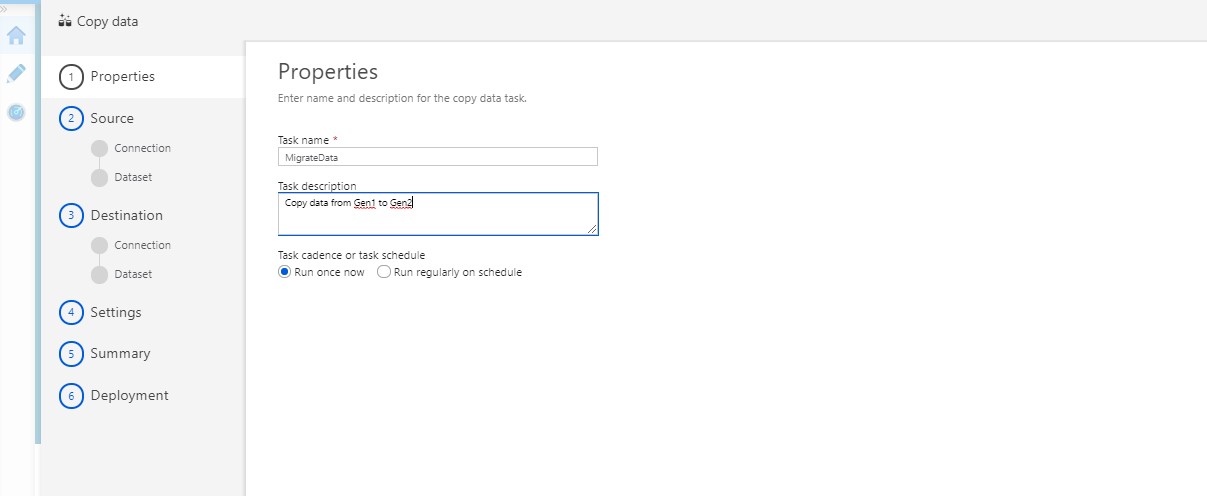
- Fill the details in the Properties page and click Next
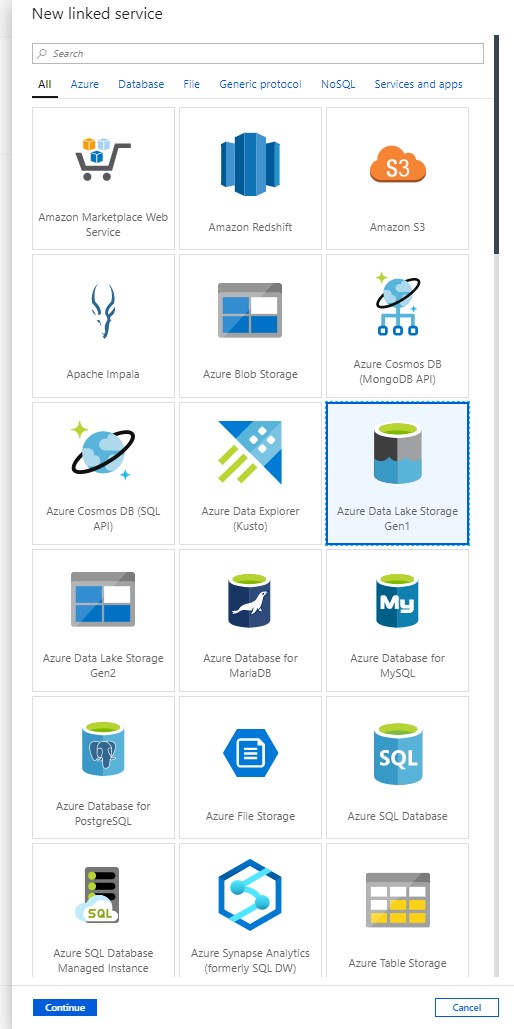
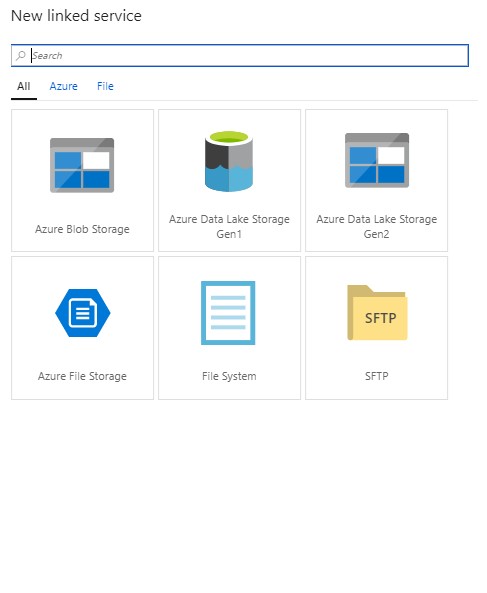
- Select the source, then Create a new connection for Data Lake Gen1
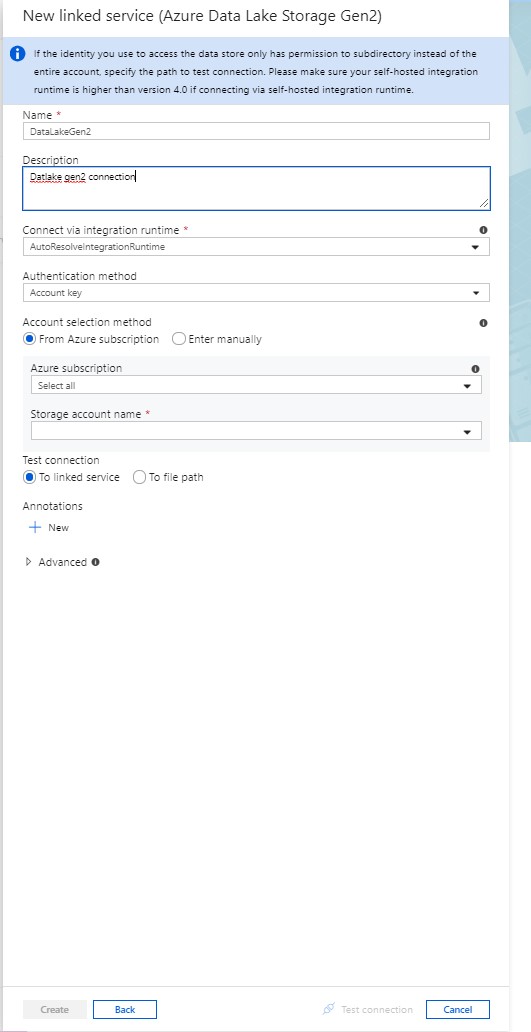
- Fill out the required parameters. You can use either Service Principal or Managed Identity for Azure resources to authenticate your Azure Data Lake Storage Gen1.
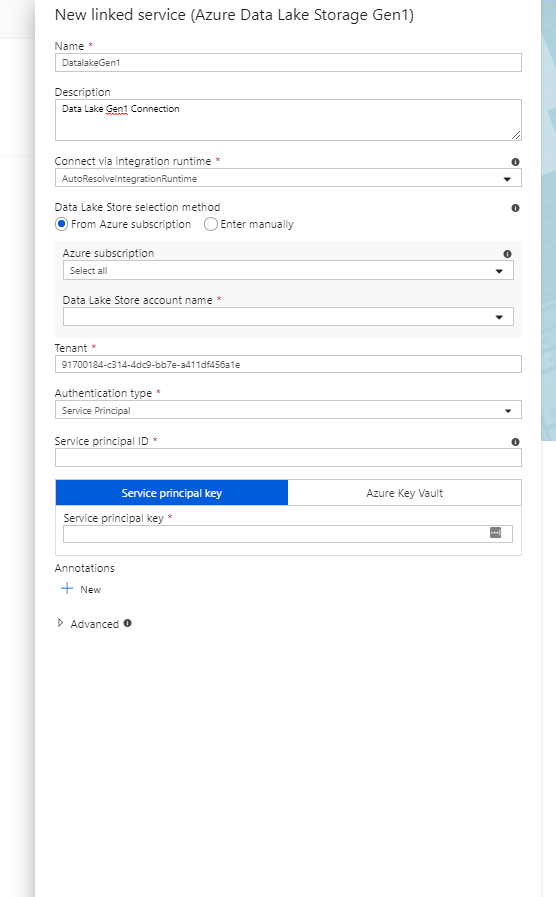
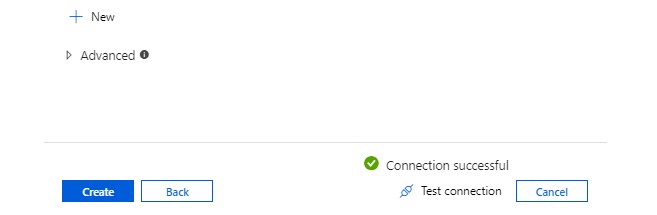
- Test the connection, then click Create
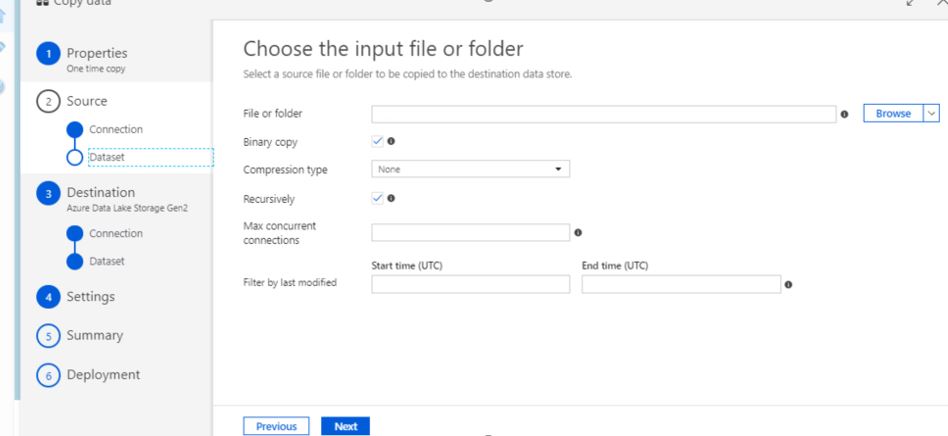
- Select your folder in the Dataset as shown below
- Select the destination & create a new connection for ADLS Gen2.
- Fill out the required parameters. You can use either Service Principal or Managed Identity for Azure resources to authenticate your Azure Data Lake Storage Gen1
- Test the connection, then click Create
- Select the destination & select the folder in the Dataset then click Next
- Check and Verify the Summary, then click Next
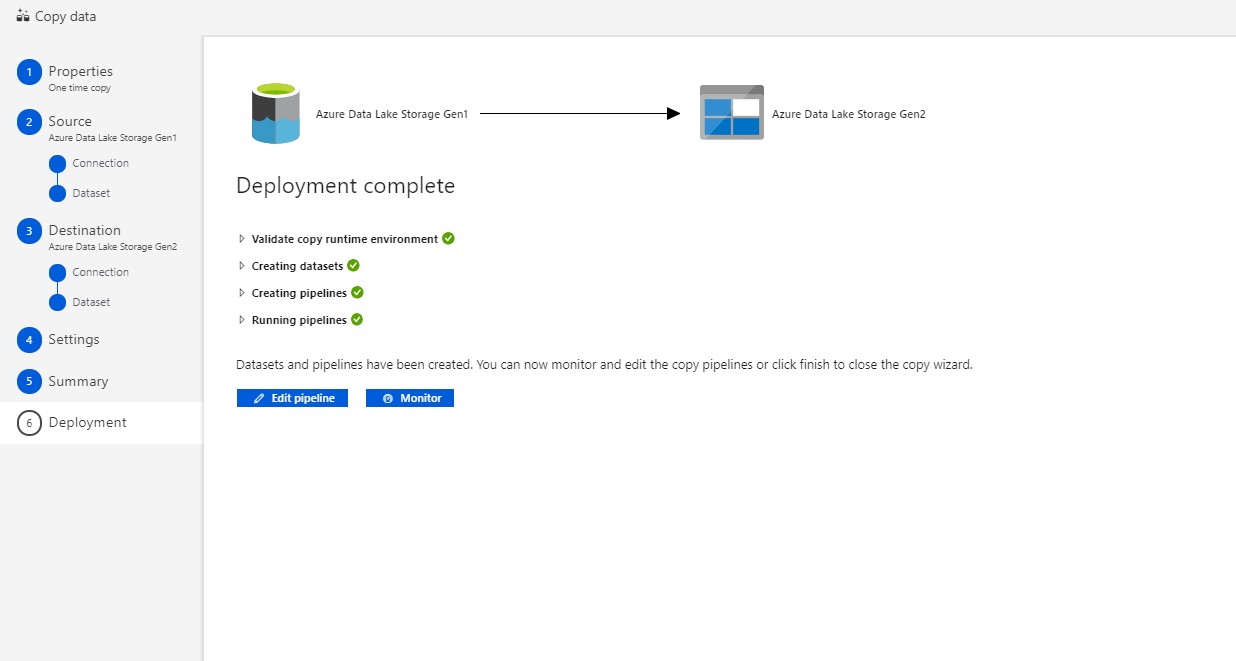
- Pipeline will be executed right away.
- Monitor the Status
- Navigate to the Monitor tab, and see the progress

- You can also view more details by viewing the Activity Runs and view Details

As always do let us know if you have questions or comments using the comments section below!